
Entities
Adding, editing, filtering and deleting entities, including bulk actions.
Entities are the things you document, usually taxa. The Entities panel at the bottom left of the workspace shows every entity in the project.
Adding entities#
One at a time
Type a name in the New entity… (Enter) box below the Entities panel and press Enter. Press ⌘N to jump straight to this box. If the name looks like a scientific name (e.g. Dendrobium smillieae F.Muell.), the app separates genus, epithet and author automatically.
Many at once
Click the clipboard icon in the Entities panel header, open the Many at once tab, then paste one name per line. You can set a family for all of them, create the family → genus hierarchy automatically, and put them straight into a subset.
From Excel or CSV
For large lists with topic text, use Import.
Entity properties#
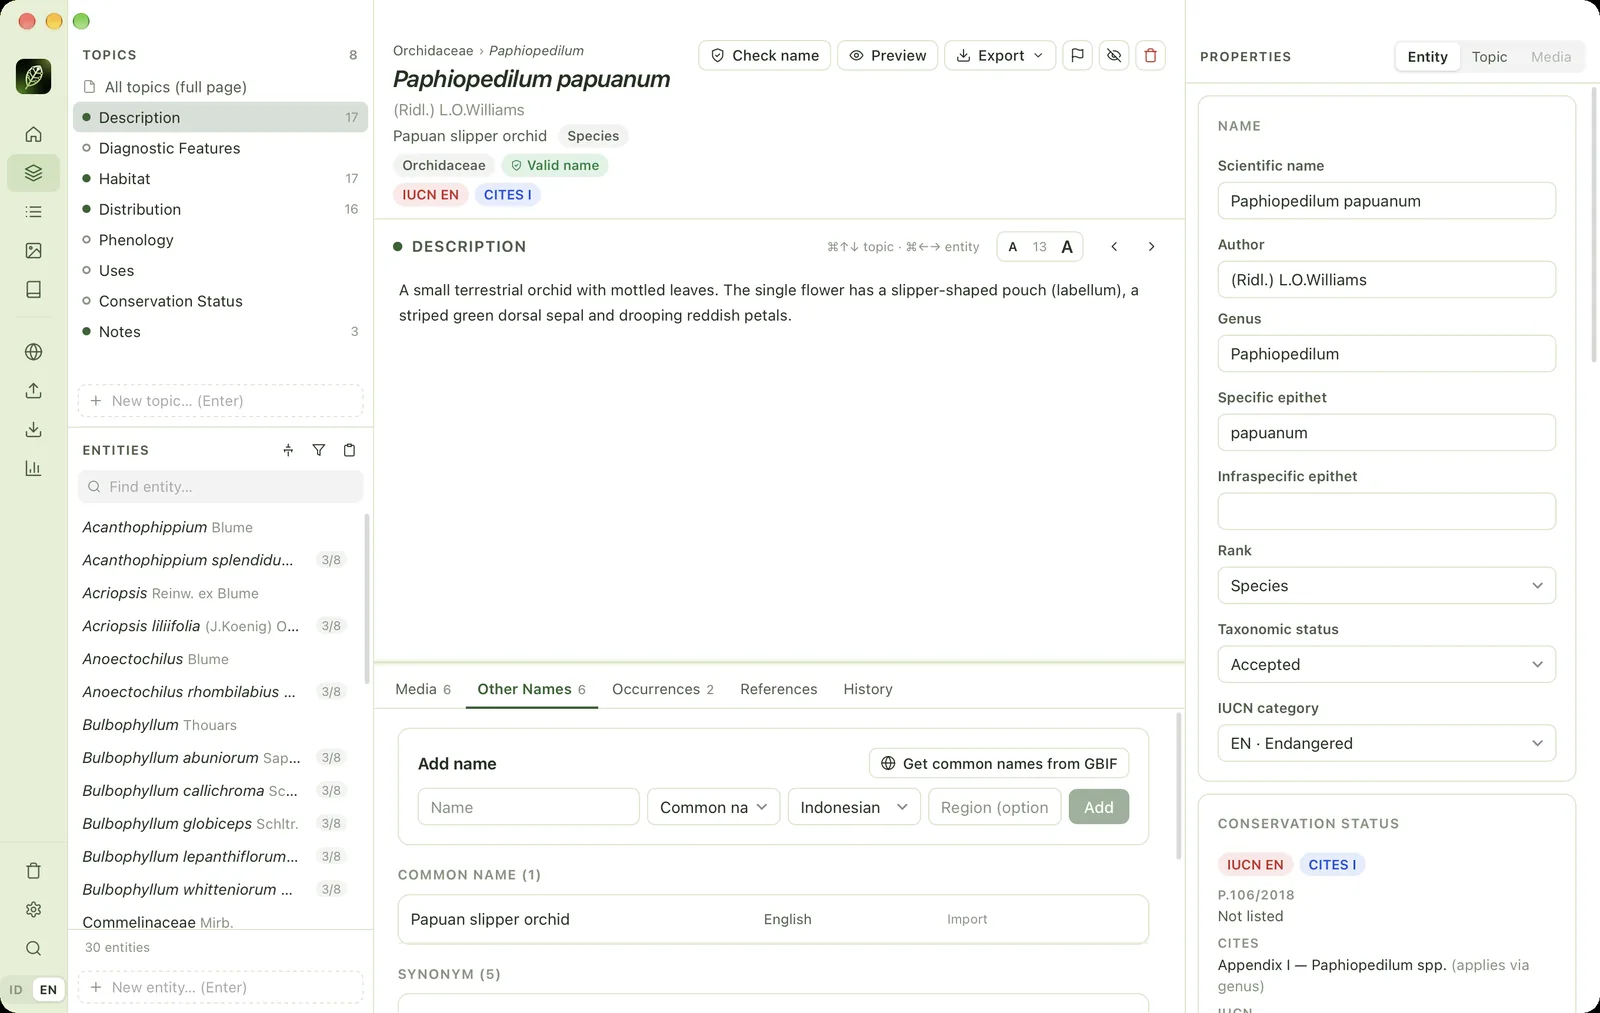
Select an entity, then open the Properties → Entity panel on the right. The available fields:
- Name: scientific name, author, genus, specific epithet, infraspecific epithet, rank, taxonomic status and IUCN category.
- Conservation status: results of the IUCN, P.106/2018 and CITES check. See Conservation status.
- Classification: kingdom to family, and the parent taxon. The Complete from GBIF button fills in the levels that are still empty.
- Other: page author, short summary, internal notes (not exported), the Needs review and Exclude from export flags, external identifiers (POWO, IPNI, GBIF, WoRMS, COL) and subsets.
Reading the entity list#
- Scientific names are shown in italics, followed by the author in a faded colour.
- A number like 3/8 means three of eight topics are filled in. A tick means every topic is filled in.
- Status badges: EN a threatened IUCN category, P protected under P.106/2018.
Filters, sorting and the tree#
The funnel icon in the panel header opens sorting options (A–Z, family, last modified, newest) and filters: rank, family, subset, and status (incomplete text, no media, protected under P.106, listed in CITES, IUCN threatened, status not checked, names not checked, problem names, needs review, excluded) and Species only. The funnel icon is highlighted while a filter is active.
The tree icon shows the family → genus → species hierarchy. Drag a node to change its parent. In the tree, ↑ ↓ select and → ← expand or collapse a node.
Selecting many entities & bulk actions#
Select several entities with ⌘-click (add/remove), ⇧-click or ⇧↑/⇧↓ (range), or ⌘A (everything shown). The centre column turns into the bulk actions panel.
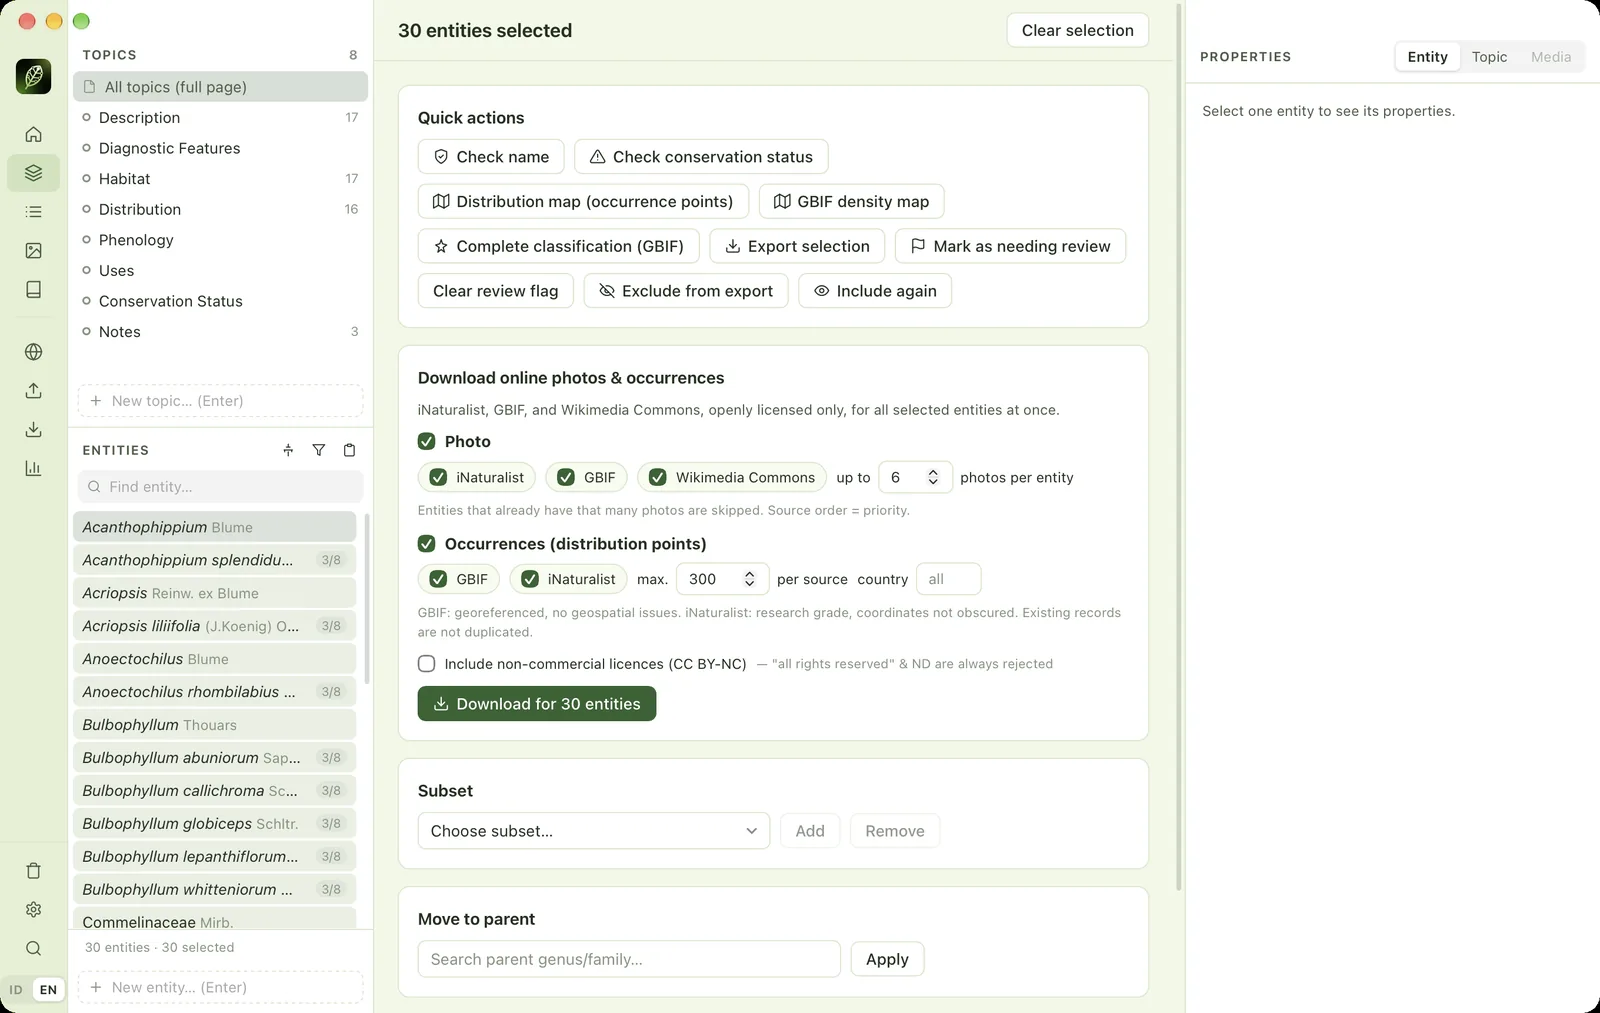
- 1Number selectedHow many entities are selected.
- 2Clear selectionBack to a single entity (Esc).
- 3Selected entitiesHighlighted rows = selected. ⌘-click, ⇧-click or ⌘A.
- 4Quick actionsCheck names, conservation status, maps, classification, export and flags.
- 5Online photos & occurrencesDownloads photos and distribution points for every selected entity.
- 6Non-commercial licencesOff by default. Only turn it on if the result is not for commercial purposes.
- 7DownloadStarts downloading. Progress appears in the Jobs panel.
- 8SubsetAdd the selected entities to, or remove them from, a subset.
- 9Move to parentMoves the selected entities to another genus or family.
Other names#
The Other Names tab in the bottom panel stores common names, local names (with their language and region), synonyms (with author) and misapplied names. The Get common names from GBIF button fills in common names automatically.
References#
The References tab stores the entity's references: paste the full citation, DOI, URL and year, then click Add. Removing a reference only detaches it from this entity.
Deleting & restoring#
Select the entity and click the red trash icon in the entity header, or press ⌘⌫. The entity goes to the Trash; it is not removed immediately, and an Undo message appears briefly.
To restore, open Trash at the bottom of the sidebar and click Restore or Restore all. Empty deletes permanently, together with the text, other names and media links, and cannot be undone.